-
Solo Business Courses
-
 Others
-
Overseas Tutorials
-
Photography & Editing
-
Community & Private Domain
-
Self-Media Writing & Copywriting
-
Side Income Projects
-
E-commerce
-
Short Video & Live Streaming
-
Artificial Intelligence (AI)
-
Software & Tools
-
Operating Systems
-
Plugins & Scripts
-
MacOS Software
-
Android Software
-
Windows Software
Generative AI Essential Program: Detailed Illustrated cuDNN Install Tutorial
-
Game Gold-Farming Money-Making Plan: Earn 1k+ Daily, a Stable 3-Year Project Anyone Can Do in Spare Time [Revealed]
Study material — included with membership Get Membership -
Hot-game fully-automated earning: 500+ a day, no experience, simple operation - the steadiest long-term game-earning side hustle (revealed)
Study material — included with membership Get Membership -
FlyingMouse earns merit this time! Don't panic at Windows format problems — the open-source FlyingMouse format conversion tool helps, a popular GitHub gem
Study material — included with membership Get Membership -
Douyin Product-Selling Coaching Bootcamp: No On-Camera Appearance Needed, Newbies Can Produce Selling Short Videos by Following the Steps
Study material — included with membership Get Membership -
First-release game gold-farming money plan: 1K+ a day, ordinary people in spare time
Study material — included with membership Get Membership






-
FlyingMouse earns merit this time! Don't panic at Windows format problems — the open-source FlyingMouse format conversion tool helps, a popular GitHub gem
Study material — included with membership Get Membership -
LuDaShi v6.1024.4105.1121 Slim Single File
Study material — included with membership Get Membership -
2D Cartoon Animation Software Moho Pro v14.3
Study material — included with membership Get Membership -
Video Editor Aiseesoft Filmai v1.0.18
Study material — included with membership Get Membership -
To-Do Microsoft To Do v2.147 Free
Study material — included with membership Get Membership -
PR/AE/DaVinci/FCPX video Plugin Nobe OmniScope Win1.11.15 / Mac1.10.138
Study material — included with membership Get Membership


On the Hammer Software site, you'll find many generative-AI tool bundles. These usually package the needed runtime environments - install and use. However, many users prefer deploying tools themselves; doing it yourself is more rewarding! But you may hit runtime errors. Often the root cause is missing essential runtime environments.
To help you avoid detours, we've compiled essential tools, frameworks, and plugins for generative AI. Starting now, we introduce each tool's features and install tutorial - even zero-basis users handle it easily.
Essential Tools: Three Key Components
1. CUDA: Core GPU-Acceleration Technology
CUDA, short for Compute Unified Device Architecture, is NVIDIA's parallel-computing platform. It lets your GPU handle complex computation, offloading work from the CPU to the GPU and greatly boosting efficiency. In generative AI, CUDA is the foundational tool for accelerating big-data computation and complex algorithms.
2. cuDNN: Deep-Learning Acceleration Gem
cuDNN (CUDA Deep Neural Network) is also an NVIDIA tool optimized for deep neural networks. Built on CUDA, it provides highly optimized computation for convolution, pooling, activation functions, and other core operations. This acceleration library is widely used in mainstream deep-learning frameworks like TensorFlow, PyTorch, and MXNet, significantly boosting training and inference speed. Simply put, cuDNN is the "speed gem" of deep learning.
3. FFmpeg: The A/V All-Purpose Tool
In generative-AI applications, video generation and audio processing are two common scenarios, and FFmpeg is essential. As a powerful A/V tool, it efficiently handles audio/video encoding, decoding, and conversion - the unsung hero behind many AI tools.
Next, we bring detailed install tutorials to help you deploy CUDA and cuDNN step by step (note: NVIDIA GPU users only!).
cuDNN Install Tutorial
(cuDNN complements CUDA; before installing cuDNN, ensure CUDA installed successfully.)
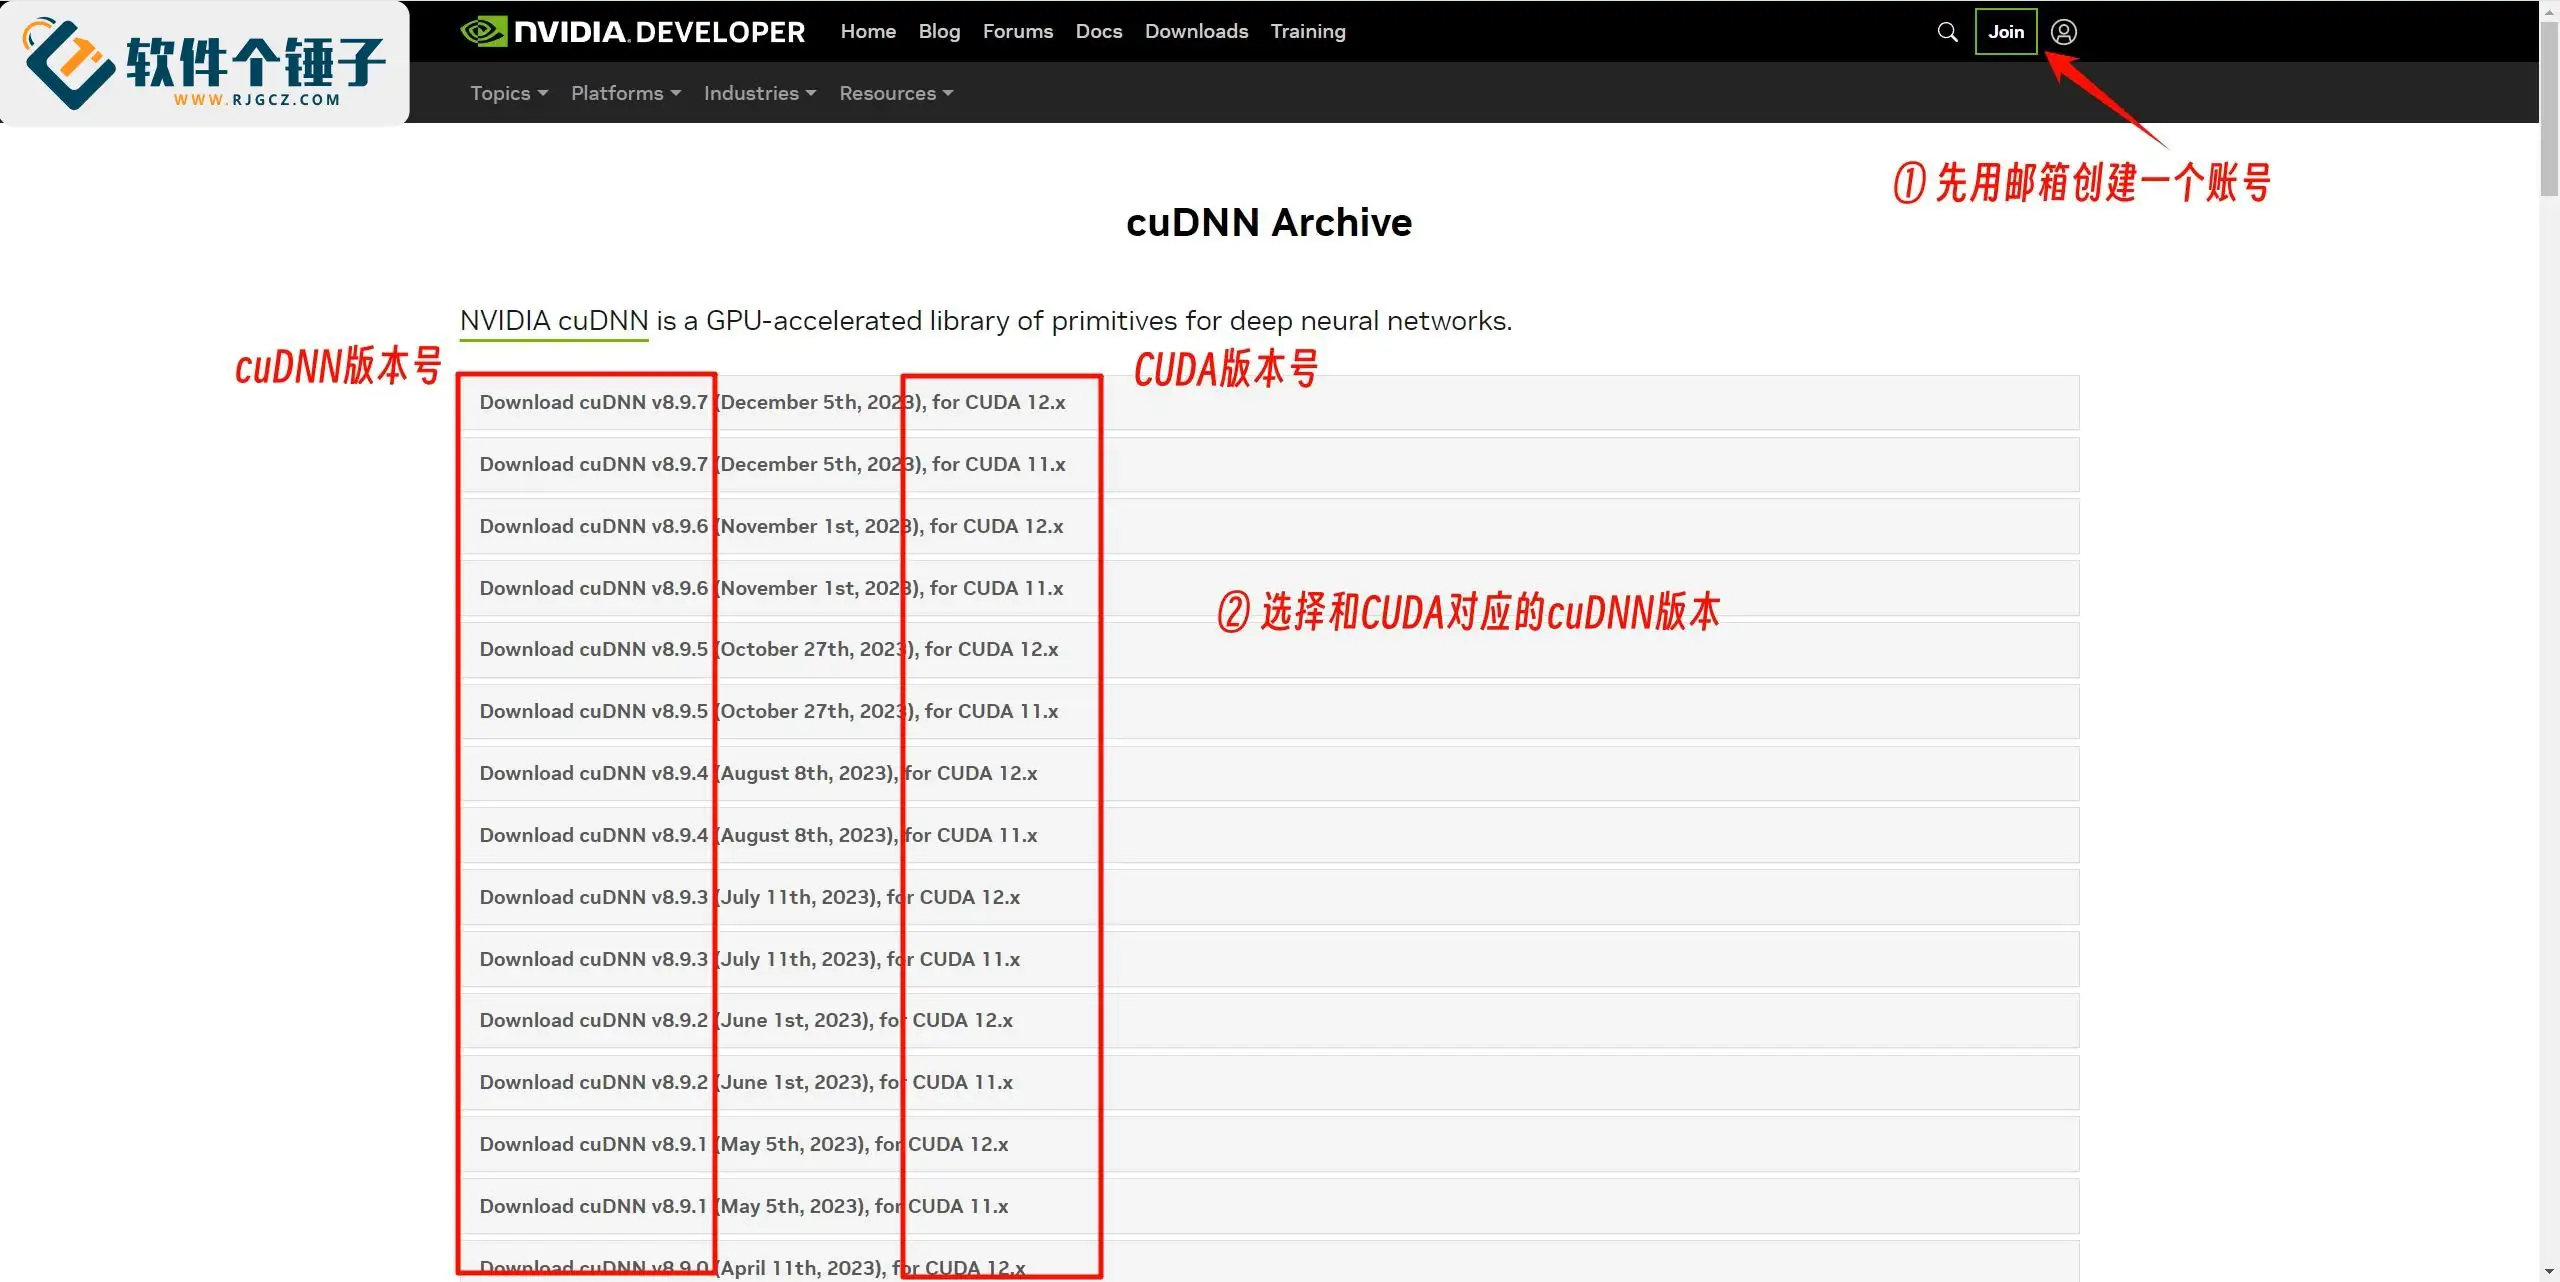
1. Download the cuDNN version matching CUDA
① Go to the official download page below, create an account with an email, then choose the cuDNN version matching your CUDA version.
Download cuDNN matching CUDA: https://developer.nvidia.com/rdp/cudnn-archive

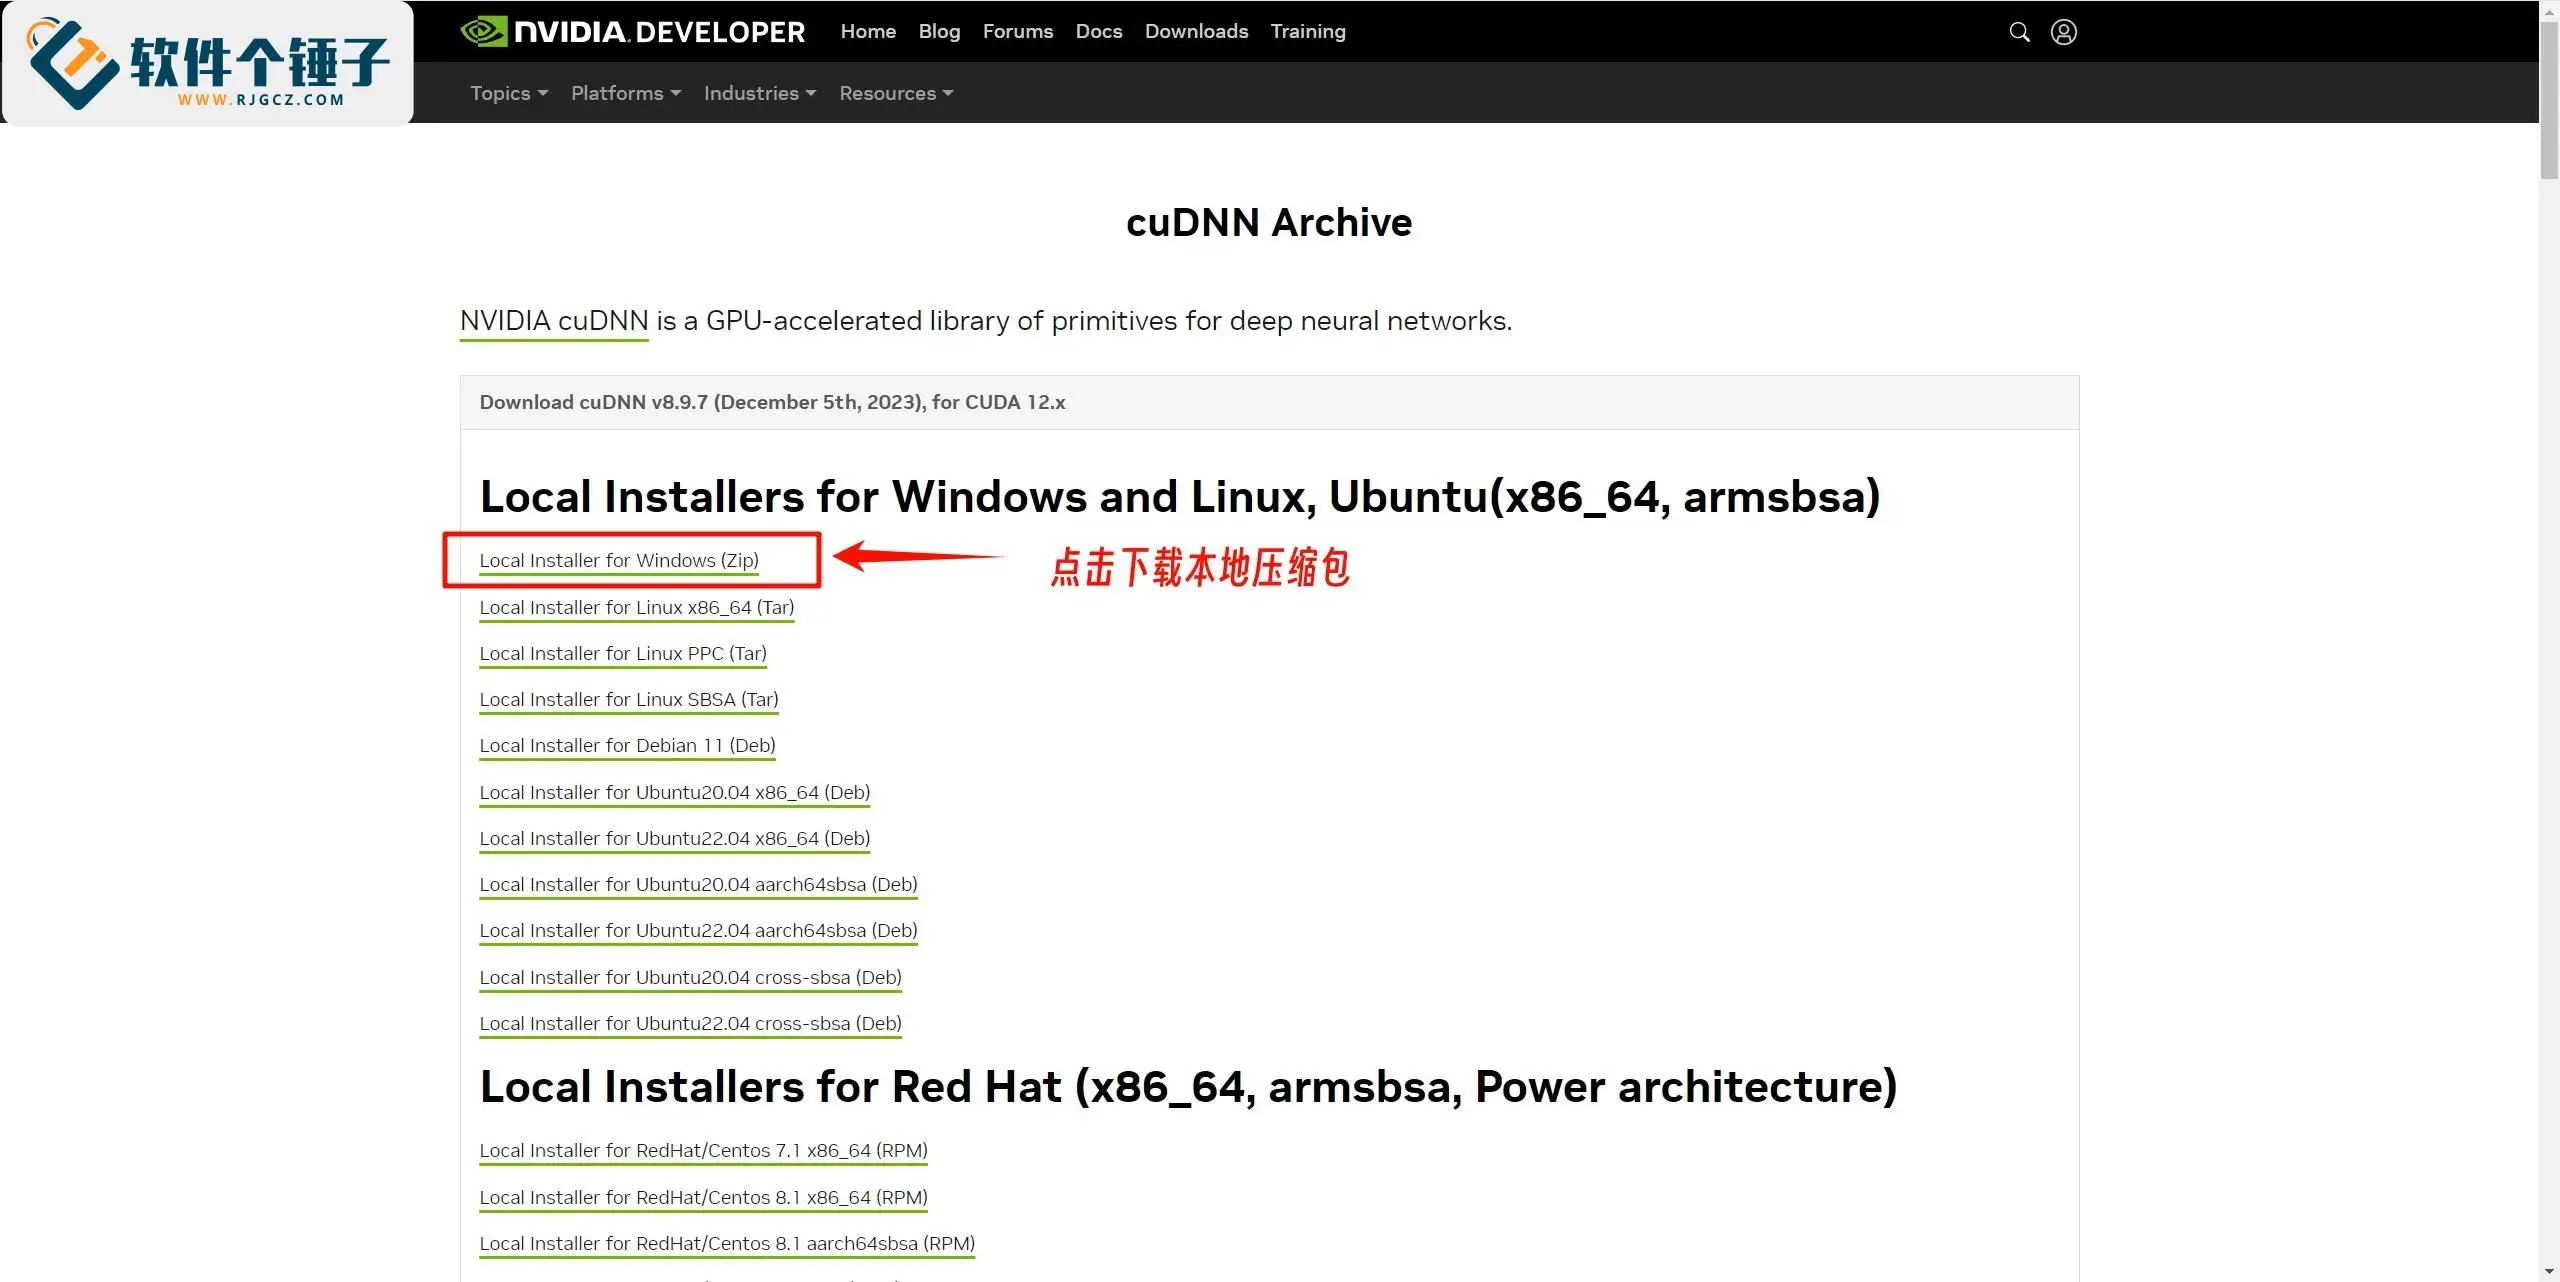
② Click "Local Installer for Windows (Zip)" to download the local archive.

2. Install cuDNN
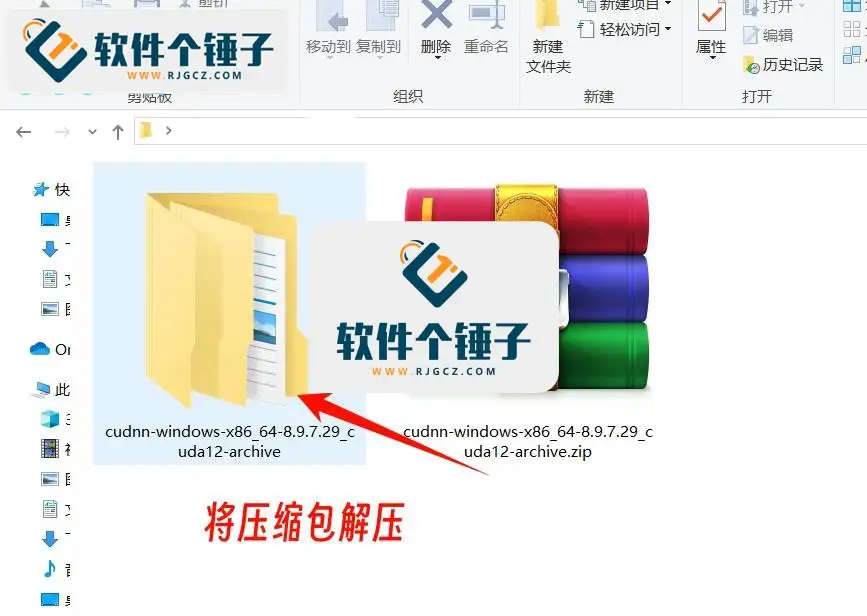
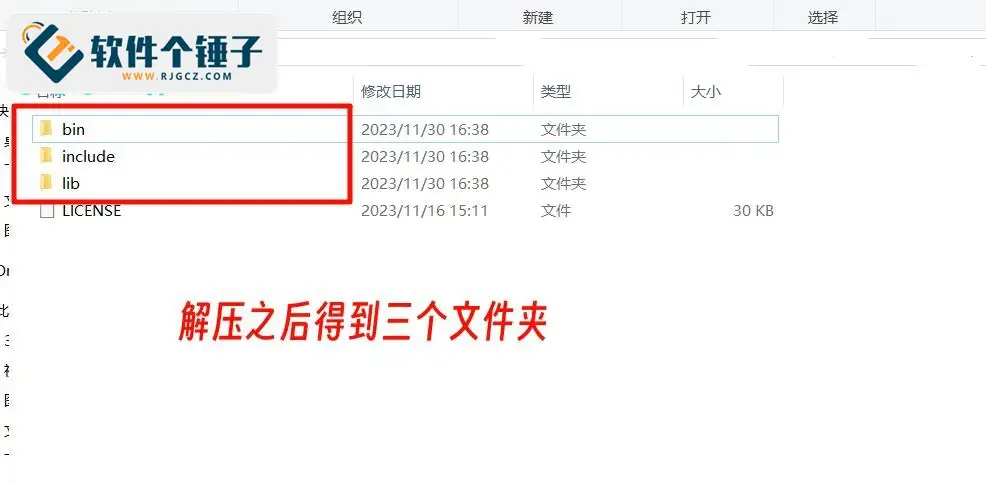
① Unzip the downloaded archive; you'll get three folders.


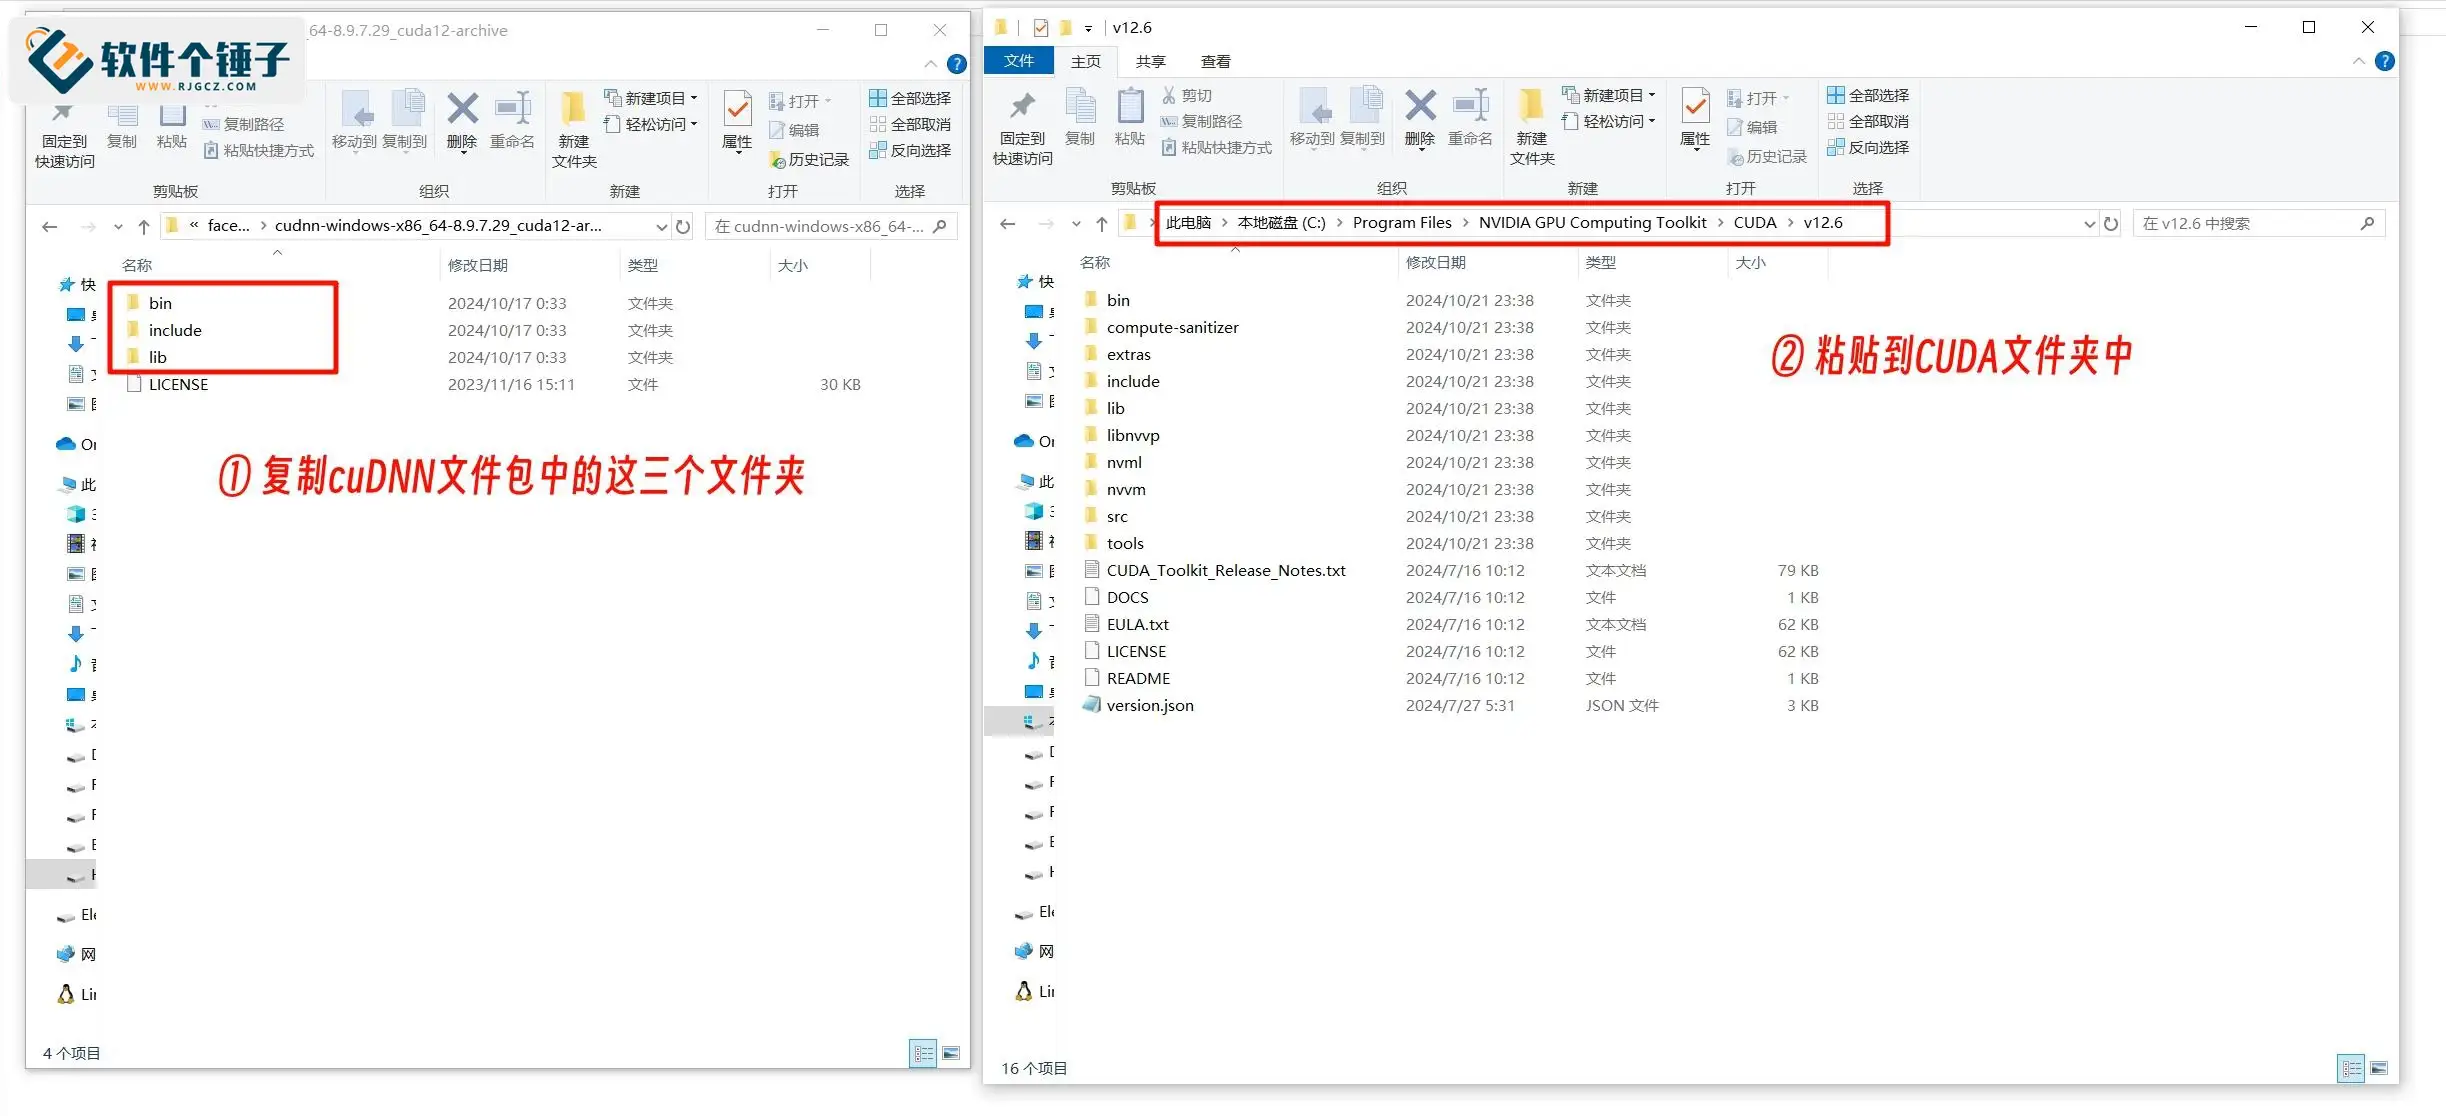
② Copy the three folders and paste them into the CUDA directory. You'll see same-named folders in the CUDA install dir; don't worry - just copy and replace.

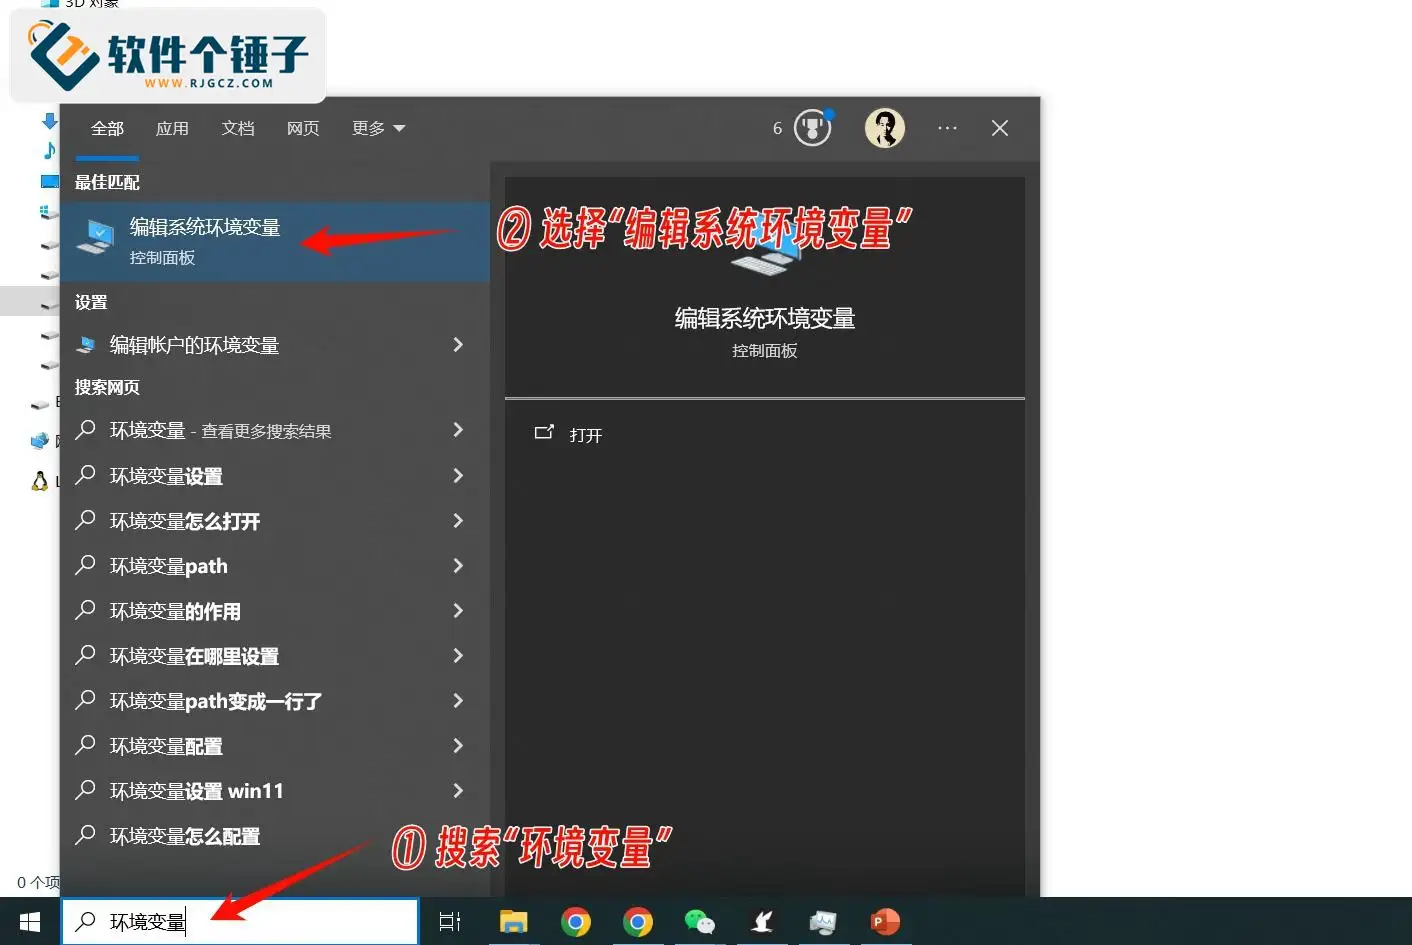
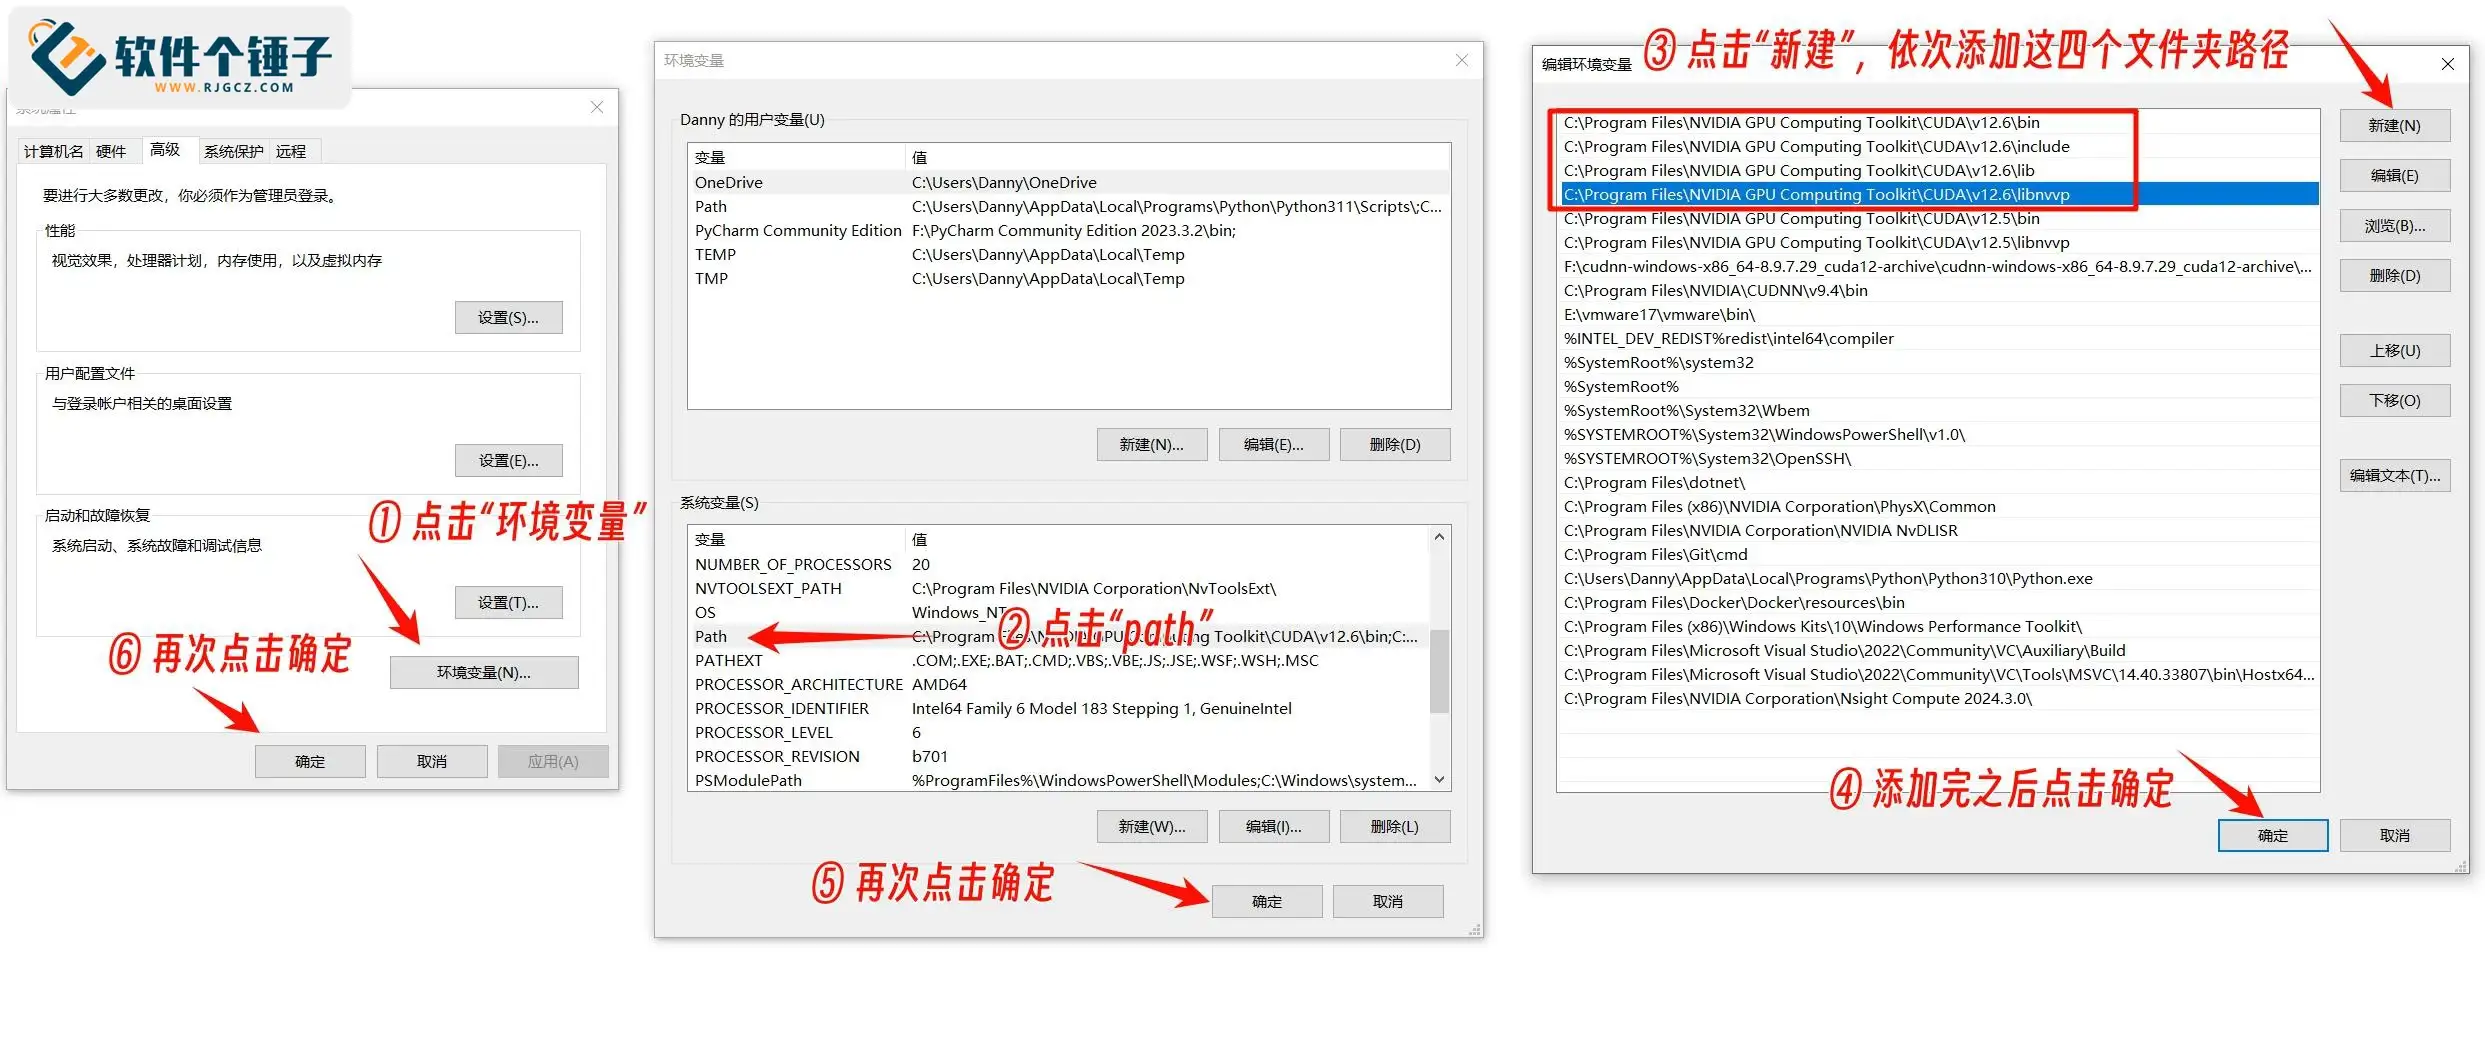
③ Add these paths to environment variables in order:
C:\Program Files\NVIDIA GPU Computing Toolkit\CUDA\v12.6\bin
C:\Program Files\NVIDIA GPU Computing Toolkit\CUDA\v12.6\include
C:\Program Files\NVIDIA GPU Computing Toolkit\CUDA\v12.6\lib
C:\Program Files\NVIDIA GPU Computing Toolkit\CUDA\v12.6\libnvvp


3. Verify cuDNN installed successfully
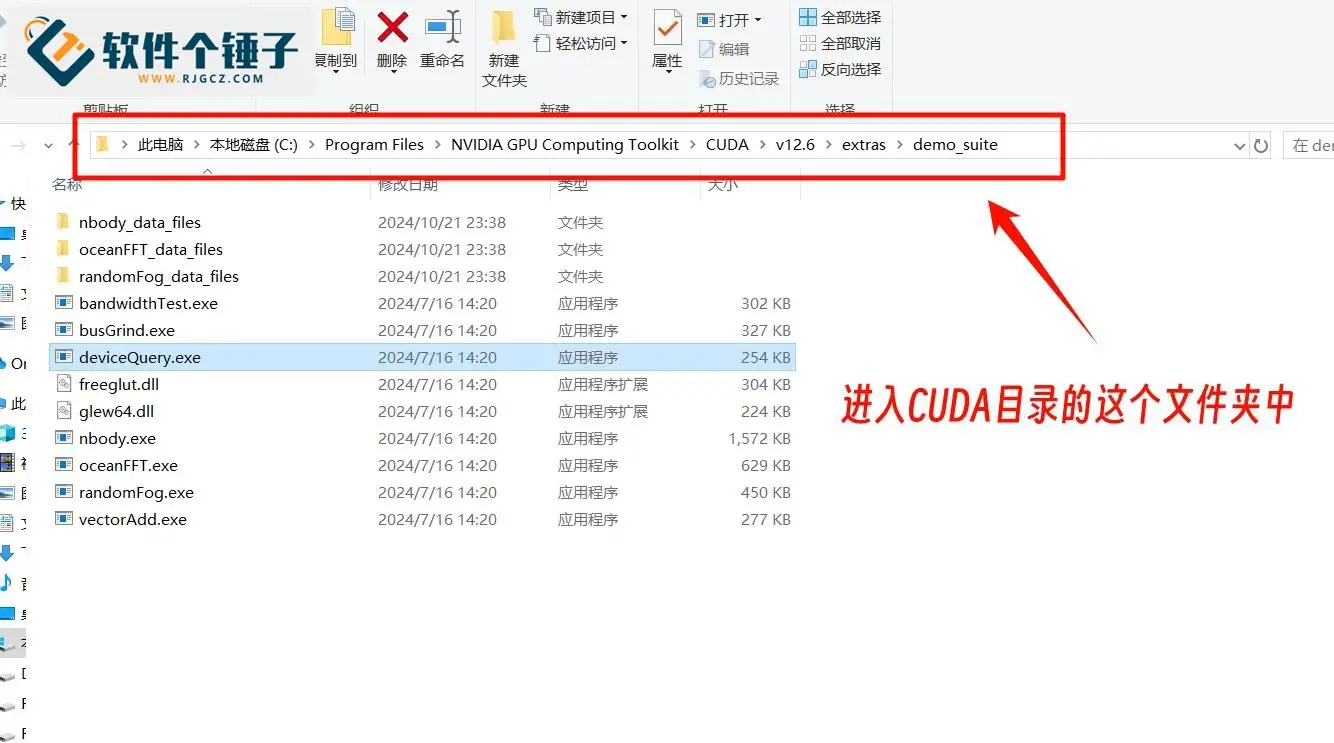
① Go to the CUDA directory's "demo_suite" folder.
C:\Program Files\NVIDIA GPU Computing Toolkit\CUDA\v12.6\extras\demo_suite

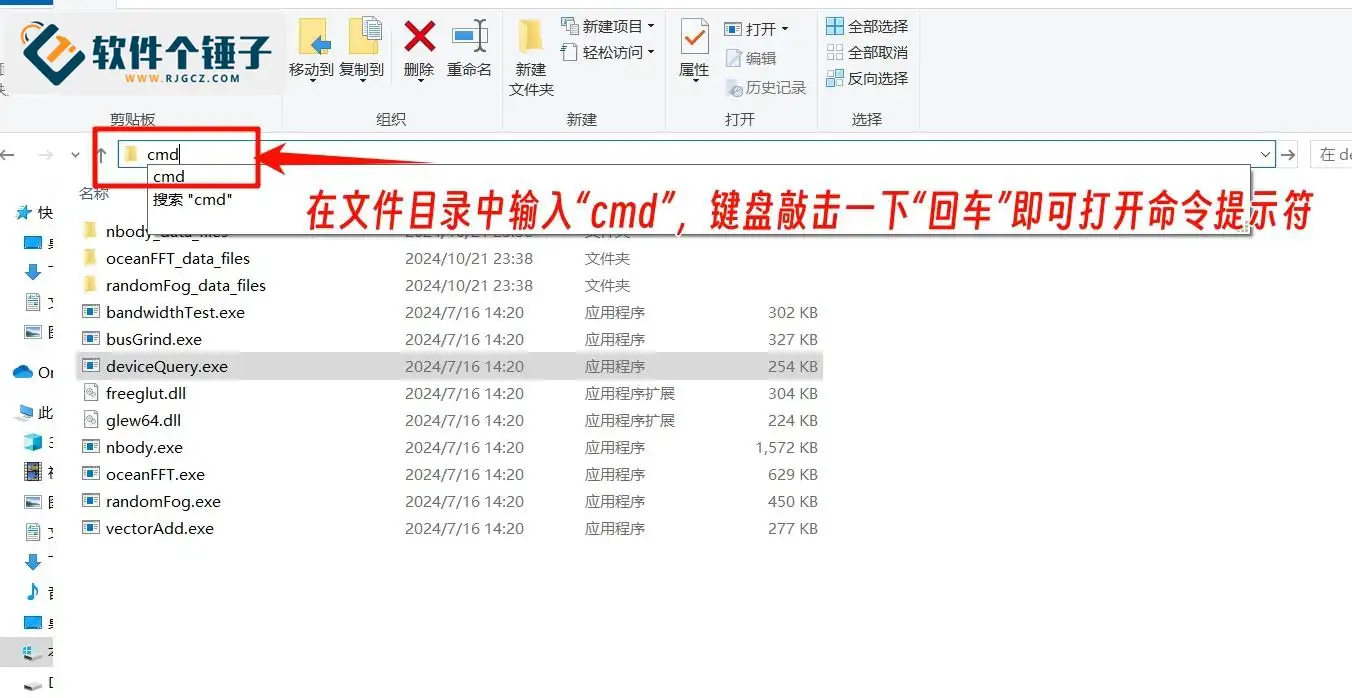
② In the folder's address bar type "cmd" and press Enter to open the command prompt.

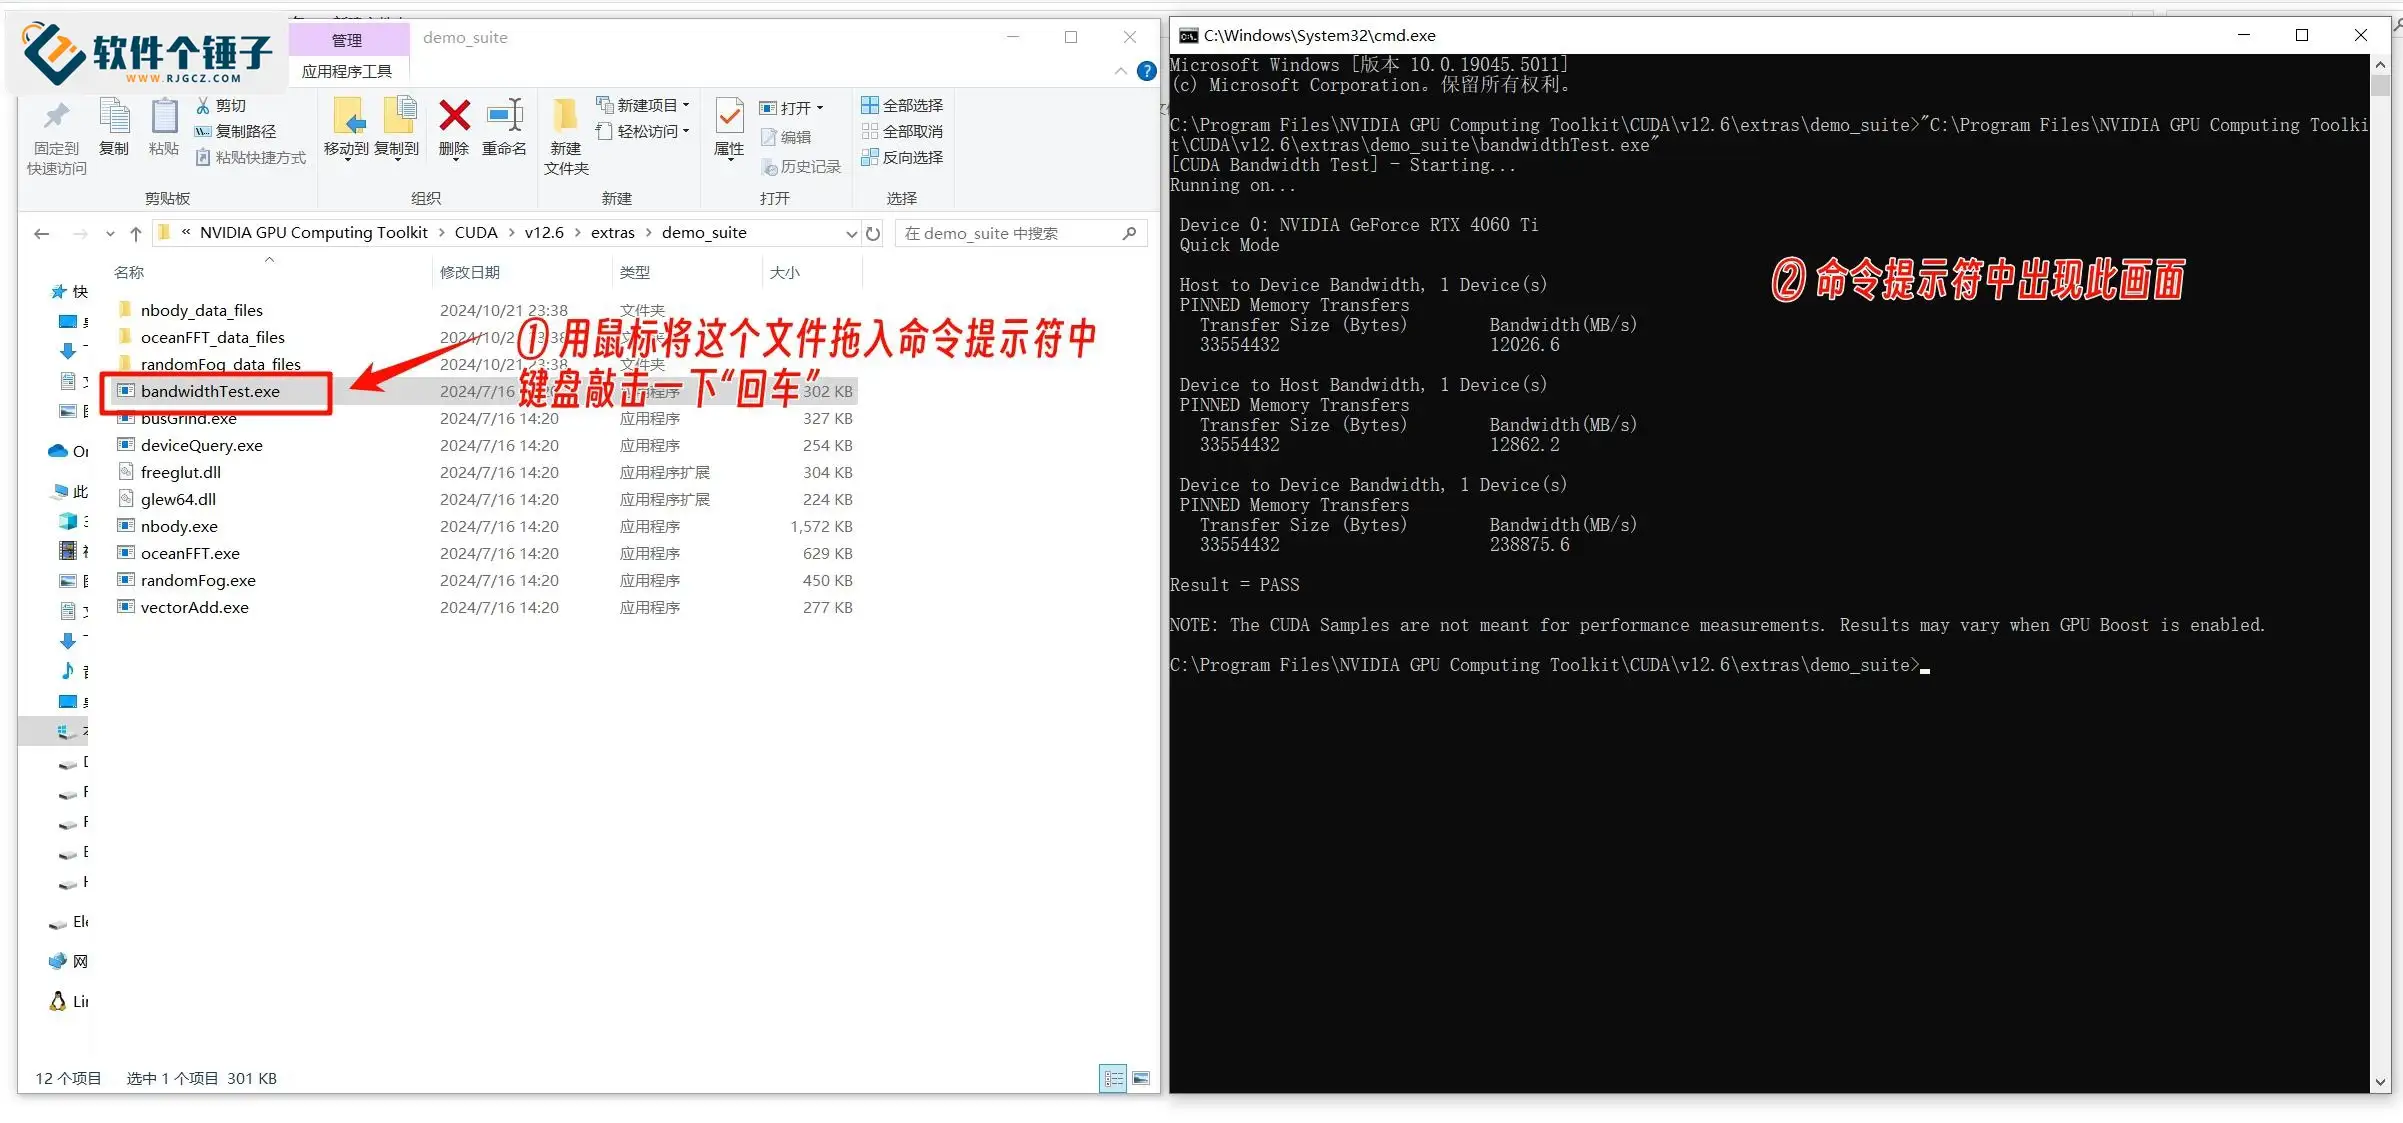
③ Drag "bandwidthTest.exe" from the folder into the command prompt and press Enter. If the expected output appears, proceed; otherwise cuDNN didn't install successfully.

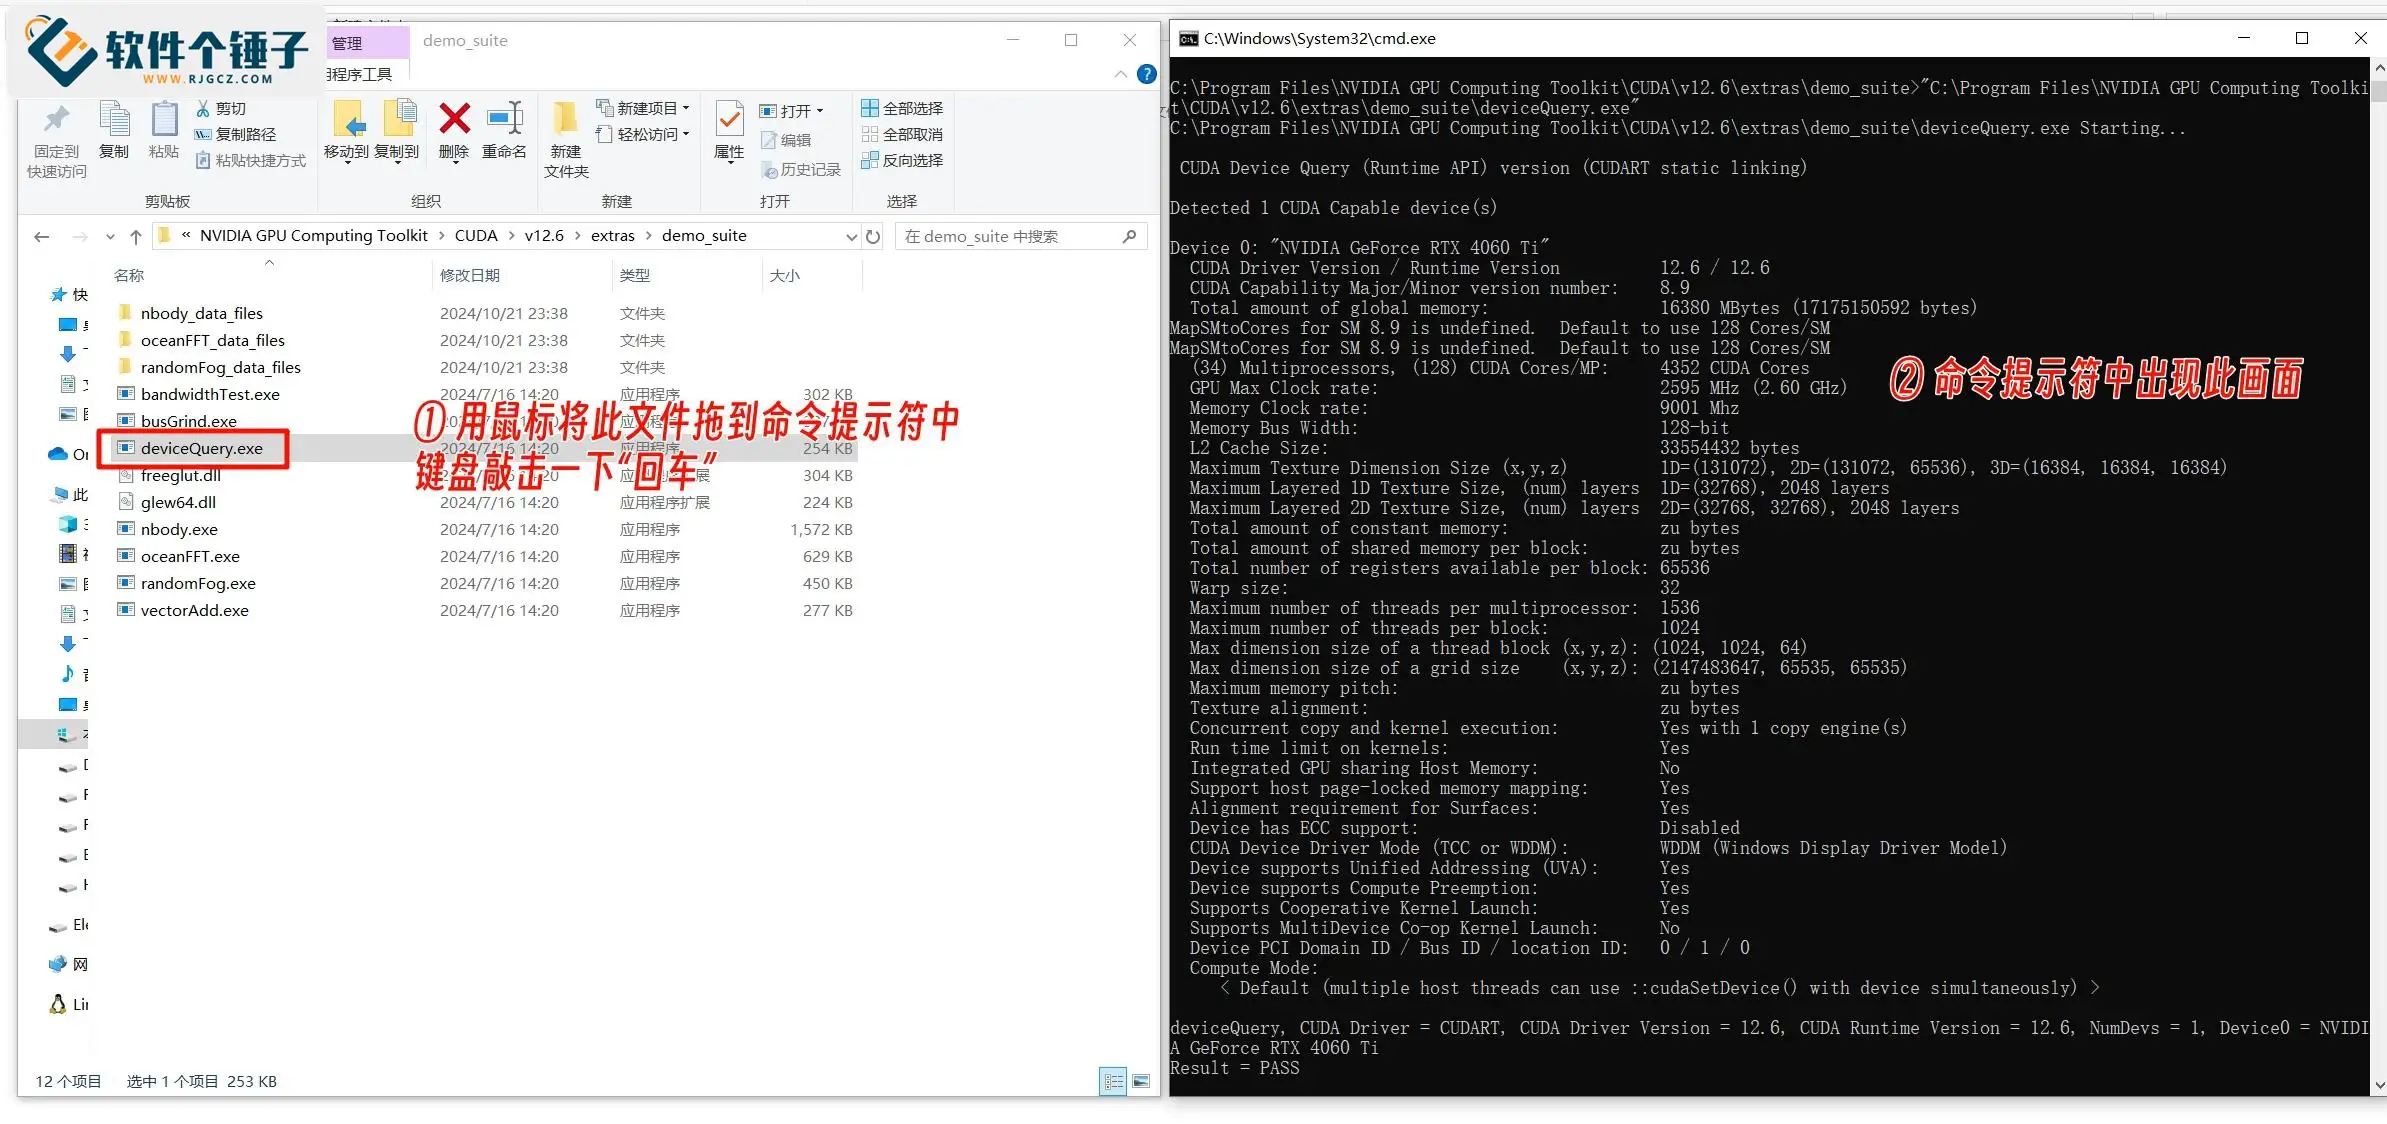
④ Then drag "deviceQuery.exe" into the command prompt and press Enter. If the expected output appears, cuDNN installed successfully.

Detailed illustrated CUDA install tutorial
Detailed illustrated FFmpeg install tutorial
Related Courses
Super local toolbox! Built-in screen recording, audio/video cutting & merging, video compression & extraction, forever free - Kedou Video Converter
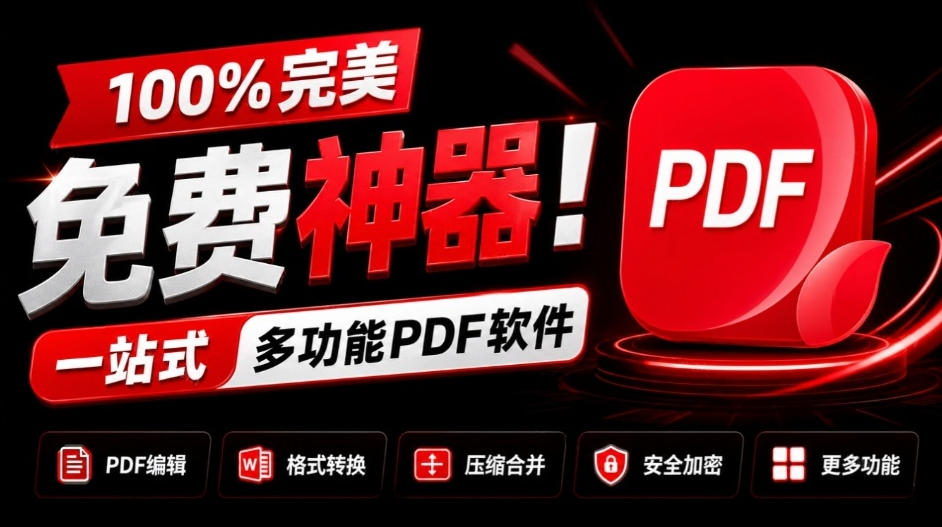
100% perfect free tool! One-stop multi-function PDF software: PDF convert, compress, edit etc., minimal, no ads, so nice - JOPDF

Open-Source Desktop Remote Tool, Beats Paid Versions! Free for Personal and Commercial Use Unlimited, Cross-Platform, HopToDesk Remote Control

Latest K-12 Textbook Downloader: Whole-Grade Resource Download, Courseware, Video, Audio in One Click

HuyanBao: free blue-light eye-care app with pet break reminders
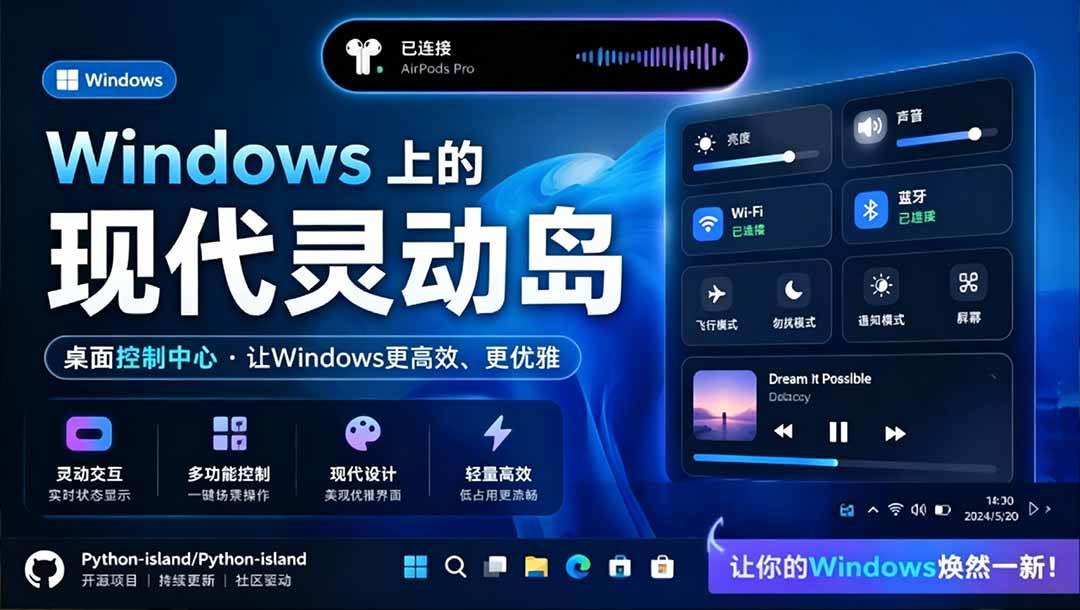
Windows Can Have a Desktop Dynamic Island Too! A Modern System Control Center — Give Your PC a Black Notch, PyIsland

3D Simulated Comic Drama Production: Seedance2.0 Full-Process Practical Course - From Zero to One High-Quality Comic Drama Creation

Win/Mac Dual Support! Latest Permanent Lifetime Version, Supports Old Photo Restoration, Image Sharpening and Lossless Upscaling Tool, Aiarty Image Enhancer

Online Video Course: Github Open-Source Bilibili Video Download Tool! Supports 8K and Dolby Vision Bilibili Video Batch Download Tool, Easy to Use Bilidown